
custom bar-top with glass, stone & copper


Family Madeira’s Napa Valley inspired bar-top is a custom designed, fused glass and marble expression of the Napa Valley landscape, made of glass and marble.

The long time plan of turning the kids den into a more functional wine bar/game room is finally becoming a reality. My sister and brother-in-law shared a Napa Valley vacation with us a couple of years ago and that was when I volunteered to create the bar top for them.


The only request regarding the design was that I incorporate the stone coasters that they had collected from the various vineyards on our trip. I managed to sway Manny into letting go of his initial concept and apply his cork collection to another project.
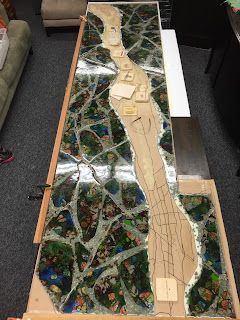
 Ariel map of the Napa Valley, I tilted the image and stretched the perspective to fit our composition (roughly 3’x10’).

an initial concept sketch
Tools for cutting, snipping and shaping glass pieces. Zag Zag Snipper, Toyo Cutter and Breaking Pliers. Sheet Glass (I’m using all COE 90 for this).


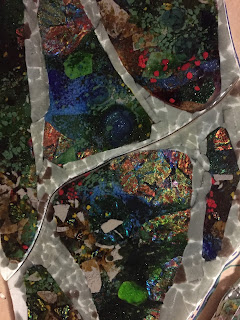
First to make the glass that will be used to create the darker components of the terrain. A selection of glass colors (translucent, opaque and dichroic) was chosen to complement the other elements and furniture in the room. My aim was to create plenty of depth and dazzle that would be as visually rewarding close up, as it is from a distance.


By layering cut glass shapes, crushed and glass powders I was able to achieve the depth and color I wanted (the white you see is actually clear glass). Then close the lid, and program the kiln to do the heat work by melting all of the elements into solid glass panels.
 The colored glass panels came out nicely.
I had made an actual-size template/sketch of the counter top so I can layout the pieces properly. Now I cut them up and shape them to create a fluid composition that will both resembles the aerial-view, valley landscape and to provide natural seams so I can divide the layout into manageable sized pieces. This is being created at my studio in California and installed in Massachusetts so packing and shipping were highly considered in the design process.


The panels were then cut and shaped using hand tools, tile saw and grinders. I plotted out the shapes of what would end up being the larger pieces to ship to the job site. Then I cut clear sheet glass of each of those shapes. The clear class would act as a base for each section and allow them to be handled and fired separately.


To work with the flow of the layout and to mimic the veins of the terrain, two colors of off-white sheet glass were cut and fitted, piece by piece in between the thicker, dark shapes.


Collaging translucent grey and bronze colored pieces over the white veins, both design and structural needs will be met. It will knock back the bright contrast to make the composition more unified, not splotchy. It adds depth to this (otherwise opaque) area so it ties in visually with the translucency of the other pieces. It also adds the thickness needed to match the height of the adjacent elements. This will insure that there is enough material to flow evenly and make a smooth surface in the final firing.


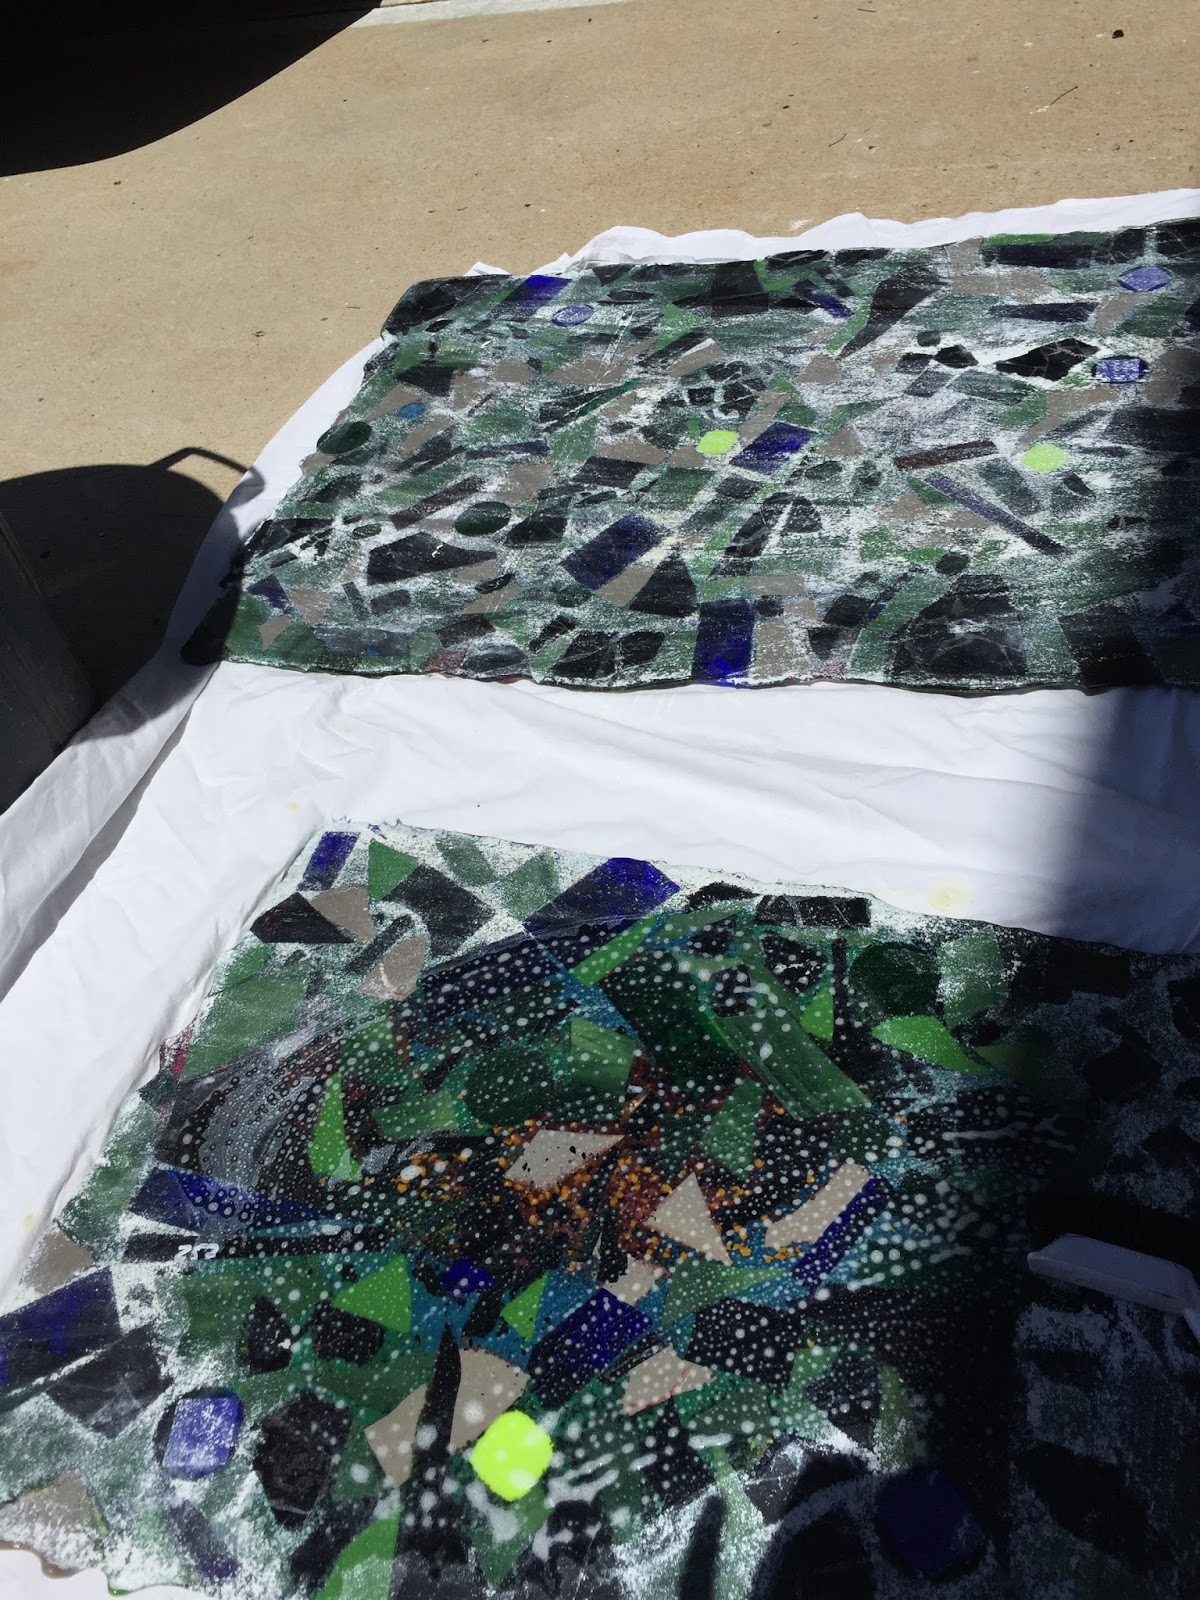
The pieces were then arranged on the kiln shelf. As many as could fit at once were butted up and fitted next to the adjoining sections, separated only with a strip of ceramic fiber felt to keep their shape. The outer edge pieces needed to be dammed with kiln furniture to keep their shape and ensure the overall consistency of thickness in all edges.

The pieces were numbered, packed and shipped to the job site via UPS. They were all perfectly intact when I arrived a week later for the install. Whew!

The wood is prepped with white primer so that any translucent areas present their true colors.

The measurements I was working off were good so everything fit as planned.


These marble tile pieces were cut, broken and tumbled back at the studio to be used for the Valley component of the design. Here they are being painted with tile sealer/enhancer before being fitted into place with the matching coasters.

Everything is in place, grouted and sealed. Next comes the copper edging to frame and finish it off…
See details of these pendant lights in another post.
No comments yet.